

Classes, locations and tags
Updated November 13, 2026
Classes, locations and tags are labels you put on sales and costs. Every report can then split or filter by them, for example profit by crew or sales by branch.
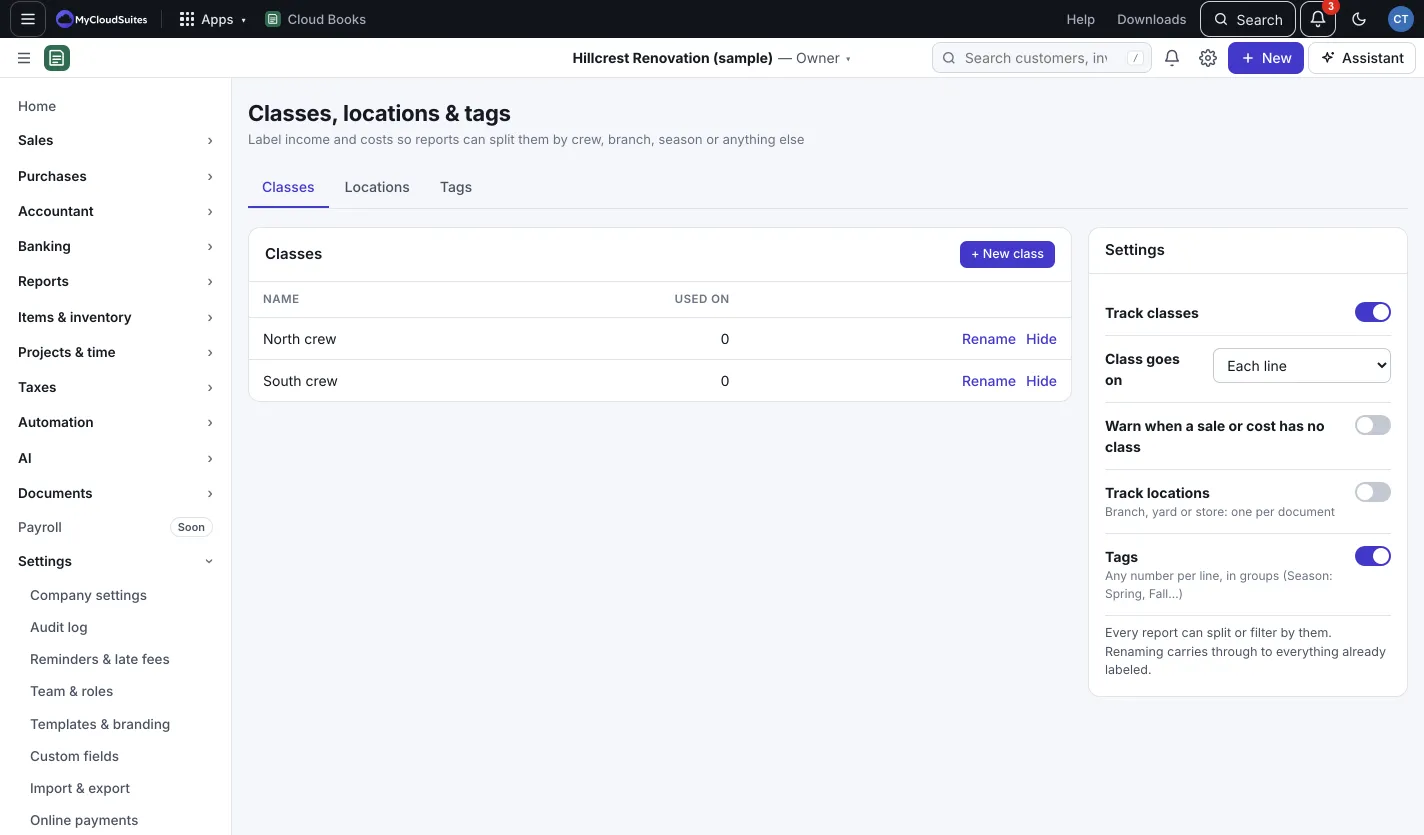
- Classes: one per line (or one per document), such as North crew and South crew. Classes can sit inside other classes.
- Locations: a branch, yard or store, one per document.
- Tags: any number per line, in groups, such as Season: Spring, Fall.
Turn them on
- Go to Settings › Classes, locations & tags. (Only the owner or an admin can change these.)
- Under Settings, switch on Track classes, Track locations or Tags.
- For classes, pick where the Class goes on: Each line or The whole document. Switch on Warn when a sale or cost has no class if every sale and cost should have one.
Add the values
- Pick the Classes, Locations or Tags tab.
- Press + New class (or + New location, + New tag).
- Type the Name. For a class, pick what it’s Inside, or Nothing (top level). For a tag, add a Group (optional).
- Press Add.
Then pick a class, location or tags on your invoices, bills and expenses as you enter them.
Good to know
- Rename changes the name on everything already labeled with it.
- Hide takes a value off the lists without changing past documents. Show brings it back.
- Used on shows how many lines carry each one.
- Keep stock in more than one place? A document’s Location also names the stock location its products come from or go into, when the names are the same. See Stock counts and locations.