

Templates and branding
Updated November 13, 2026
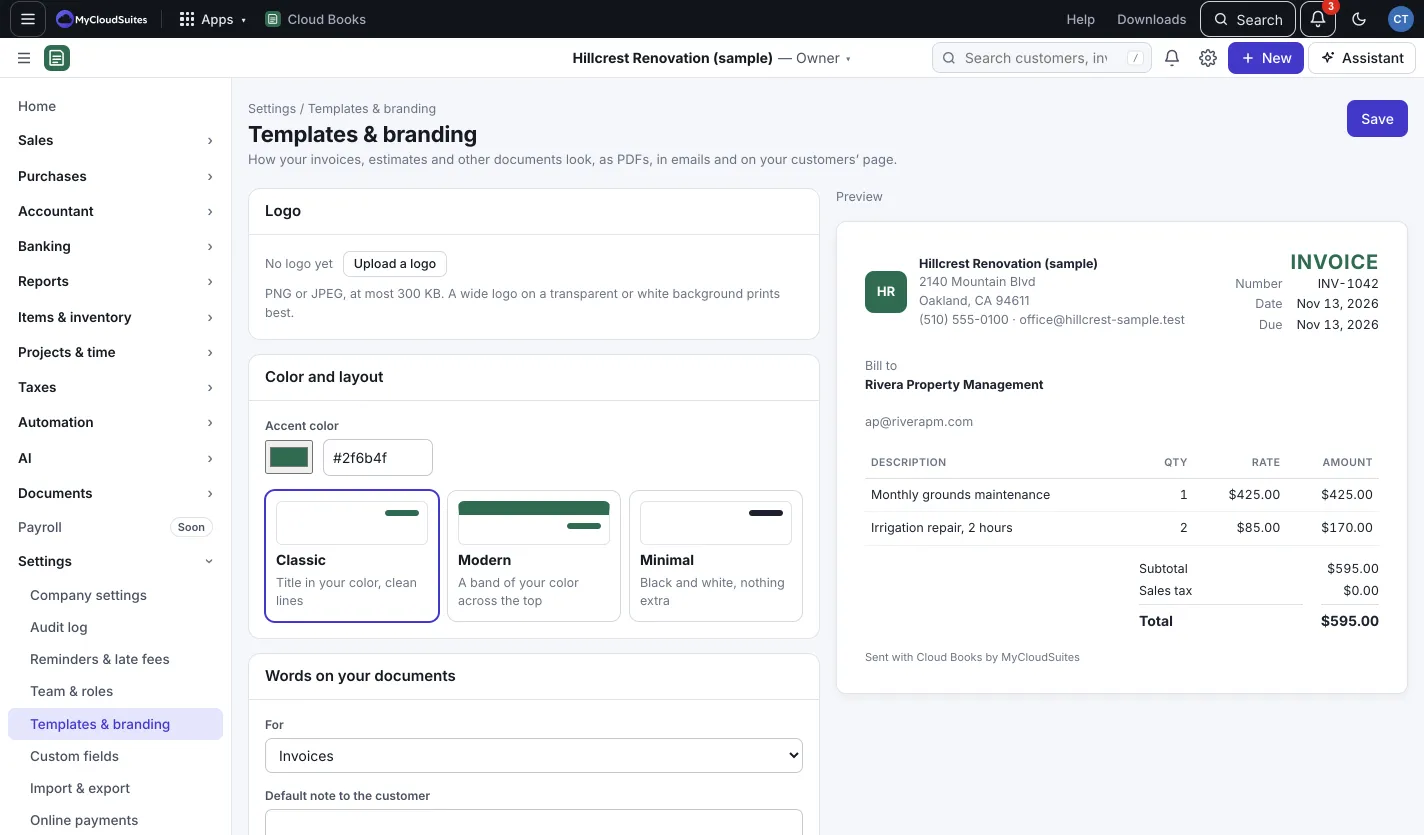
Templates & branding sets how your invoices, estimates and other documents look, as PDFs, in emails and on your customers’ page. The preview on the right shows a sample as you change things.
Make documents look like yours
- Go to Settings › Templates & branding. (Only the owner or an admin can change these.)
- Under Logo, press Upload a logo. Use a PNG or JPEG of at most 300 KB. A wide logo on a transparent or white background prints best.
- Under Color and layout, pick an Accent color, then a layout:
- Classic: the title in your color, clean lines.
- Modern: a band of your color across the top.
- Minimal: black and white, nothing extra.
- Press Save.
Set the words on your documents
Under Words on your documents:
- Under For, pick the kind of document: invoices, estimates, sales orders, credit notes, retainer invoices, sales receipts or purchase orders.
- Type the Default note to the customer. It’s filled in on new documents of that kind, and you can change it on each one.
- Type the Terms. They’re printed at the bottom of every one.
- Fill in How customers can pay you (on invoices that are still owed), such as bank transfer details, Zelle or who checks are payable to. This is one text for every kind.
- Tick or untick Pay QR code on invoices. See The pay QR code on invoices.
- Press Save.
Good to know
- To change your logo later, press Change logo, or Remove to take it off.
- The line “Sent with Cloud Books by MyCloudSuites” stays on documents on the free plan.
- Your business name, address and phone on documents come from Company settings. See Company settings.
- Extra details such as a job site can print on documents too. See Custom fields.