

Add and manage customers
Updated November 13, 2026
Every invoice and estimate goes to a customer. Customers are unlimited on the free plan.
Add a customer
- Go to Sales › Customers and press New customer. (Or use New › Customer in the top bar.)
- Fill in Customer or business name, Contact person, Phone and Email. Invoices and estimates go to this email.
- Add the address, Payment terms (for example Net 30) and Currency.
- If work happens somewhere else, tick Goods or work go to a different address and add the ship-to address.
- Under Sales tax, pick the Usual tax rate. If they don’t pay sales tax, tick This customer doesn’t pay sales tax and say why (for example, a resale certificate).
- Press Save.
Jobs or branches under one customer
Use Part of to put a customer under a parent, such as a property under Rivera Property Management. Tick Bill the parent to send statements and reminders to the parent. On the Customers list, sub-customers sit under their parent, and the parent’s amounts include them. Switch between Grouped and Flat to change the view.
A customer’s page
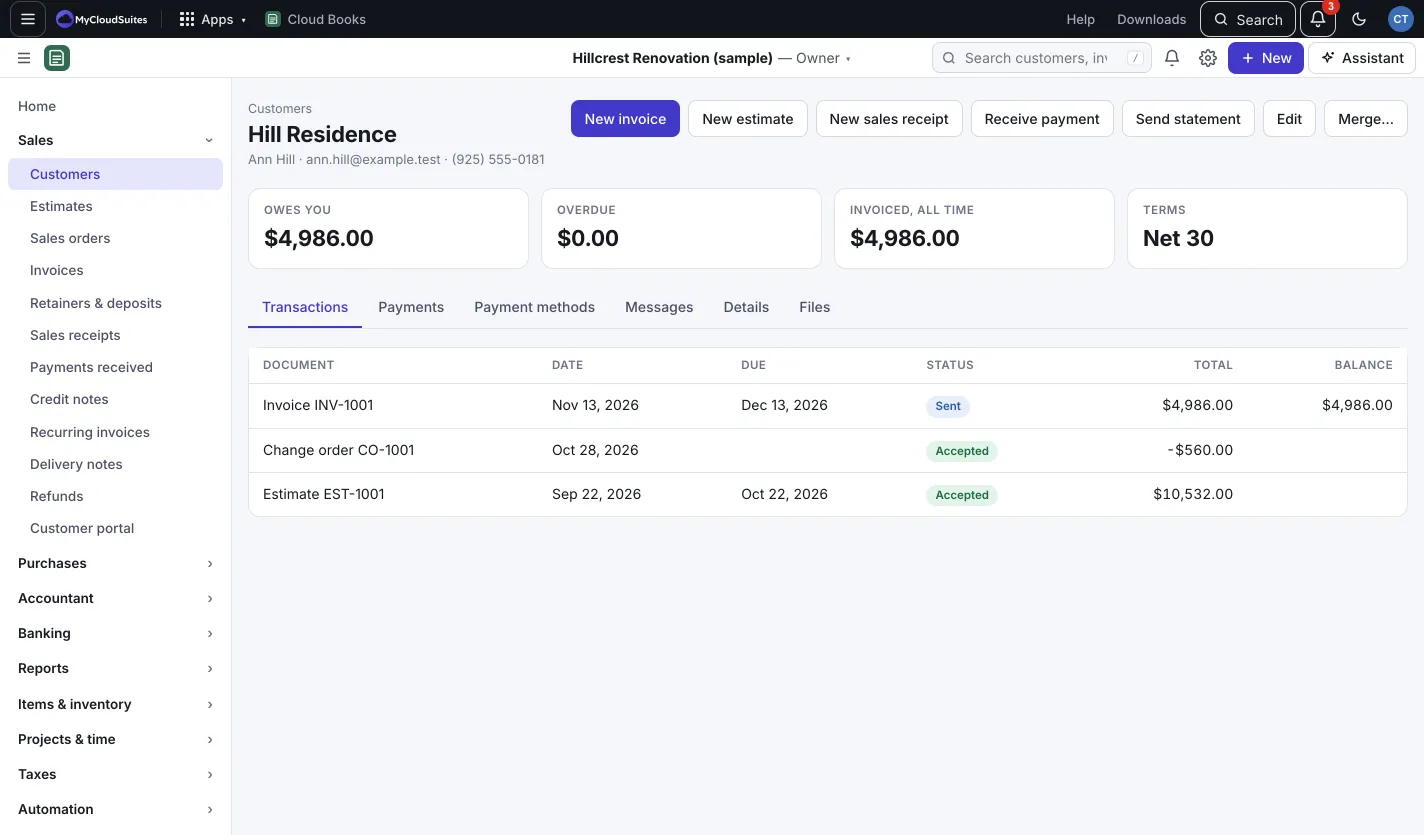
Click a customer to see tiles for Owes you, Overdue, Invoiced, all time and Terms, and these tabs:
- Transactions: every document for them.
- Payments: what they paid and what it paid for.
- Payment methods: cards or bank accounts saved through Stripe.
- Messages: notes back and forth through their portal.
- Details: contact details, their portal switch and the reminder switch.
- Files: attachments like contracts.
From the top of the page you can press New invoice, New estimate, New sales receipt, Receive payment, Send statement, Edit, or Merge….
Send a statement
- On the customer’s page, press Send statement.
- Under Show, pick Open invoices (what they owe now) or All activity for a period (balance forward).
- Press Preview PDF to check it, then Email statement.
Good to know
- To hide a customer you no longer work with, edit them and untick Show this customer in lists. Find them later with the Hidden filter.
- A red Bounced tag means an email didn’t arrive. Edit the address to fix it.
- Vendors work the same way under Purchases › Vendors. For contractors, tick Send this vendor a 1099 at year end (contractors).