

Pay bills
Updated November 13, 2026
Cloud Books never holds your money. You choose what to pay and when; each payment is recorded on its day and the vendor gets a remittance email. The money goes from your bank.
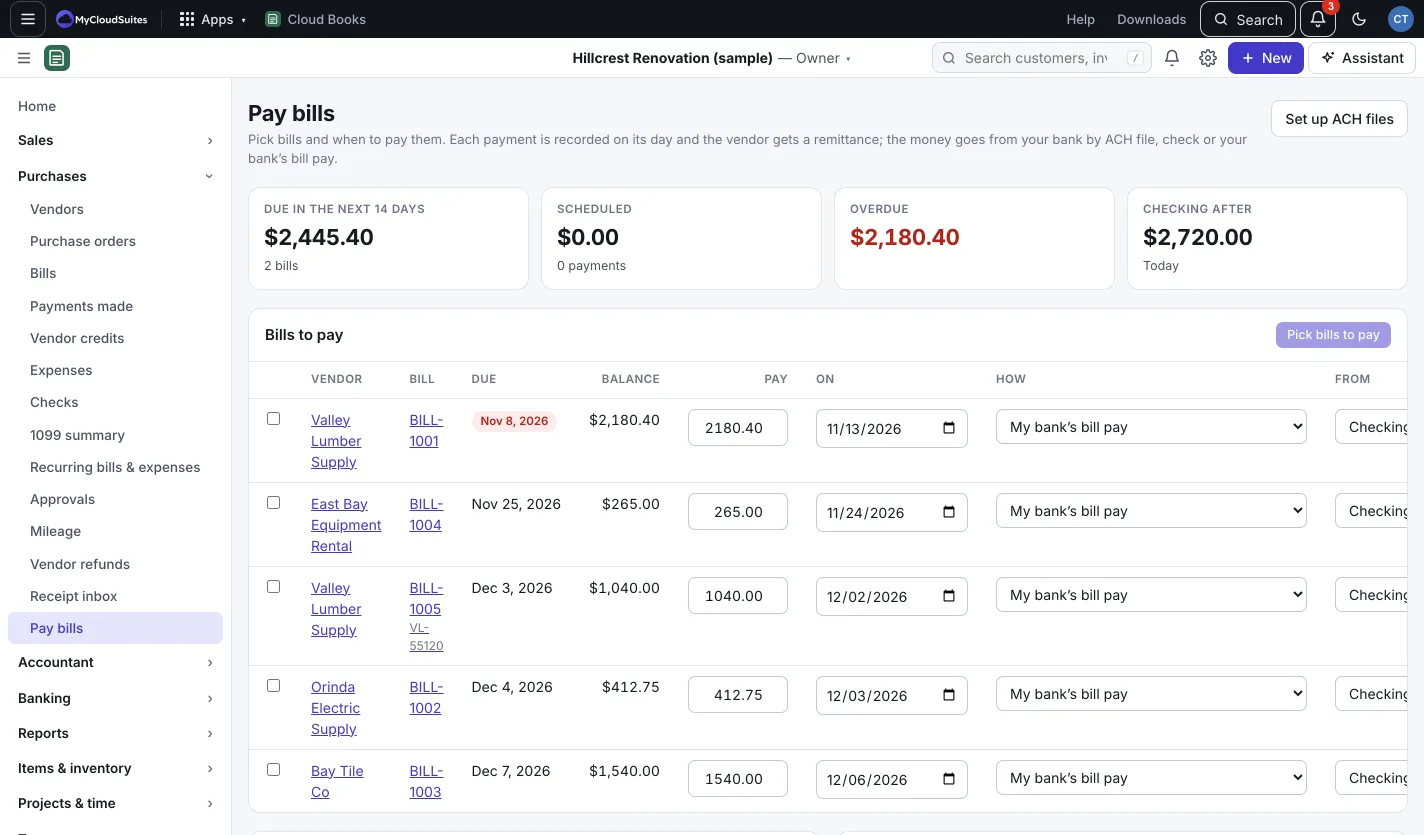
Pay one or more bills
- Go to Purchases › Pay bills.
- Under Bills to pay, tick each bill to pay.
- For each one, check the amount under Pay, the date under On, How to pay (ACH (bank transfer), Check or My bank’s bill pay) and From which account.
- Press Schedule (for example “Schedule 3 payments · $2,140.00”). The payments move to Scheduled until their day.
To change a date, pick a new one under Scheduled. To stop one, press Cancel, then Cancel payment.
Send the money
Under Send the money:
- ACH files: press Download ACH file and upload it to your bank’s business site a day or two before the date. ACH is a direct transfer from your bank account to the vendor’s. ACH needs the vendor’s bank details first.
- Checks: each check is recorded on its day with the account’s next check number, then waits in Checks to be printed.
- My bank’s bill pay: pay it in your bank’s own bill pay; Cloud Books just keeps the books.
Payments to the same vendor on the same day become one payment covering all their bills.
Set up ACH files (once)
Ask your bank for ACH origination on your business account. They give you a company ID and tell you how to upload files. Then, on Pay bills, press Set up ACH files (owners and admins) and enter Your bank’s routing number, Your bank’s name, Your company name (as the bank has it) and ACH company id, and press Save.
Vendor bank details
On a vendor’s page, the Payment details tab holds how you usually pay them, their bank account and their remittance emails. Under Bank account, press Add, or Ask (vendor name) to enter it to email them a link to type it in themselves. Turn on Email a remittance when you pay to send them a note listing the bills paid.
Print checks
- Go to Purchases › Checks. The To print tab lists checks waiting.
- Tick the checks (or Pick all), then press Print (number) checks. Use standard voucher check paper (check on top, two stubs).
- When asked whether they printed correctly, press Yes, mark printed.
To write a check for something not on a bill, press Write a check.
Good to know
- Changing a vendor’s bank details emails the owner and holds ACH payments to the new account for 24 hours. That stops the most common payment scam.
- Only the owner sees a vendor’s full account number, and every look is in the audit log.
- No fees: nothing passes through Cloud Books.