

Import a bank statement
Updated November 13, 2026
Download your transactions from your bank’s website and import them. Most banks offer CSV, OFX, QFX or QIF under something like “Download transactions”. Lines already imported are skipped, so nothing comes in twice.
Before you start
You need a bank or credit card account in your chart of accounts. If you don’t have one, go to Accountant › Chart of accounts and add it.
Import a statement
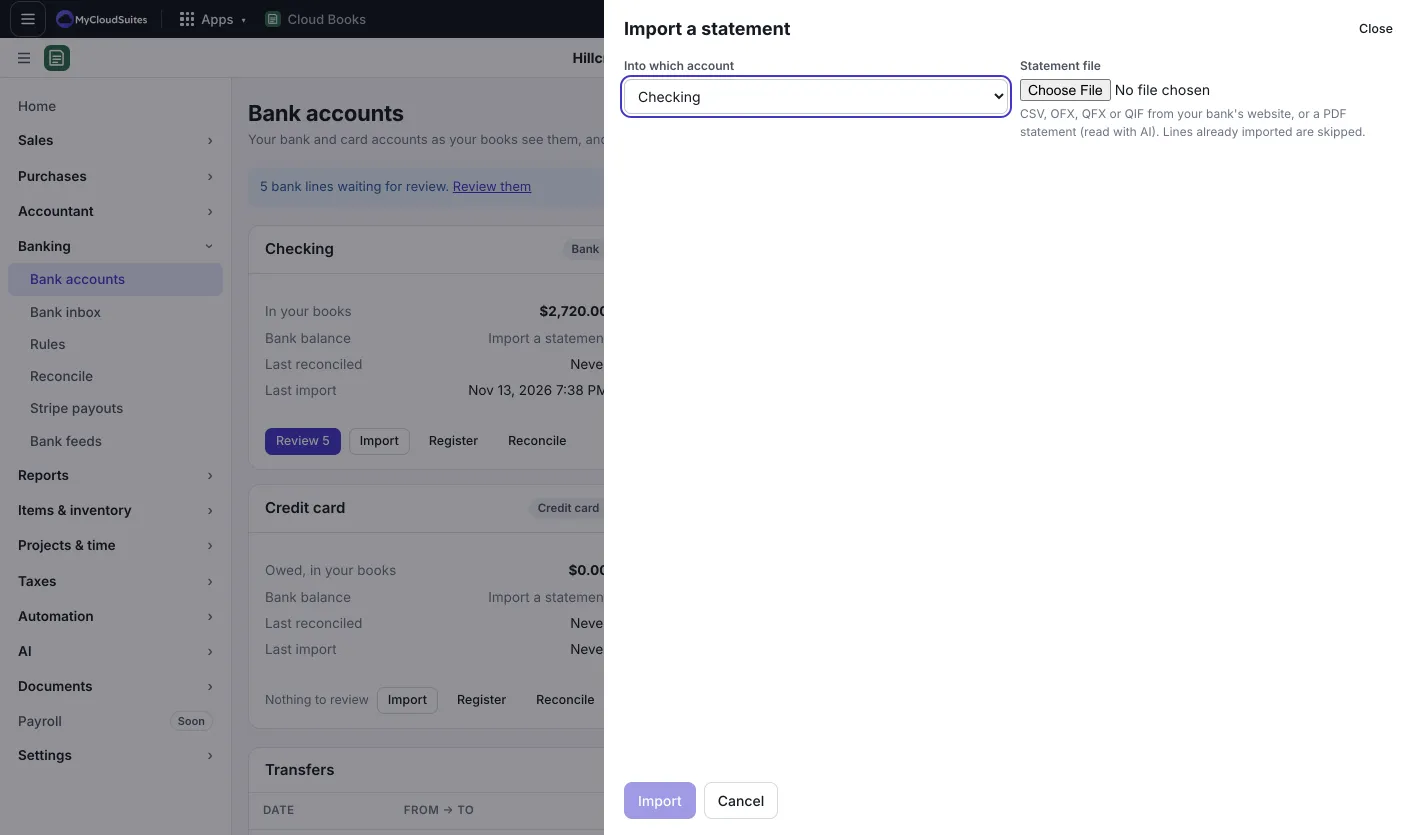
- Go to Banking › Bank accounts and press Import a statement (or Import on one account’s card).
- Pick Into which account.
- Under Statement file, choose the file.
- For a CSV file, check Which column is which: Date, Description, Date order, and whether Amounts are in One column (money out is negative) or Two columns: money out, money in. Tick Money out shows as positive (some card files) if needed. Books remembers your choice for next time.
- Check the preview, then press Import (number) lines.
- Press Review the new lines to go to the Bank inbox.
Import a PDF statement
Choose the PDF as the Statement file. Claude reads it (this uses a few AI credits; the drawer shows the estimate first) and checks that the lines add up before you import.
Transfers between your own accounts
For money moved between your own accounts, like savings to checking or paying the credit card, press Transfer on Bank accounts (or New › Bank transfer). Pick From, the other account, Amount and Date, then press Record transfer.
Good to know
- Each account’s card shows In your books, what the bank said on the last statement, any Difference, and when you Last reconciled.
- Nothing reaches your books until you confirm each line in the Bank inbox.
- Want transactions to arrive by themselves? On Bank accounts, press Connect your bank: it points you to Bank feeds (beta, with MyCloudSuites Plus), or lets you import a statement. See Live bank feeds.