

Build your own report, and saved reports
Updated November 13, 2026
When the built-in reports don’t show quite what you need, build your own. Save it, or any built-in report with its dates and options, to run again in one click.
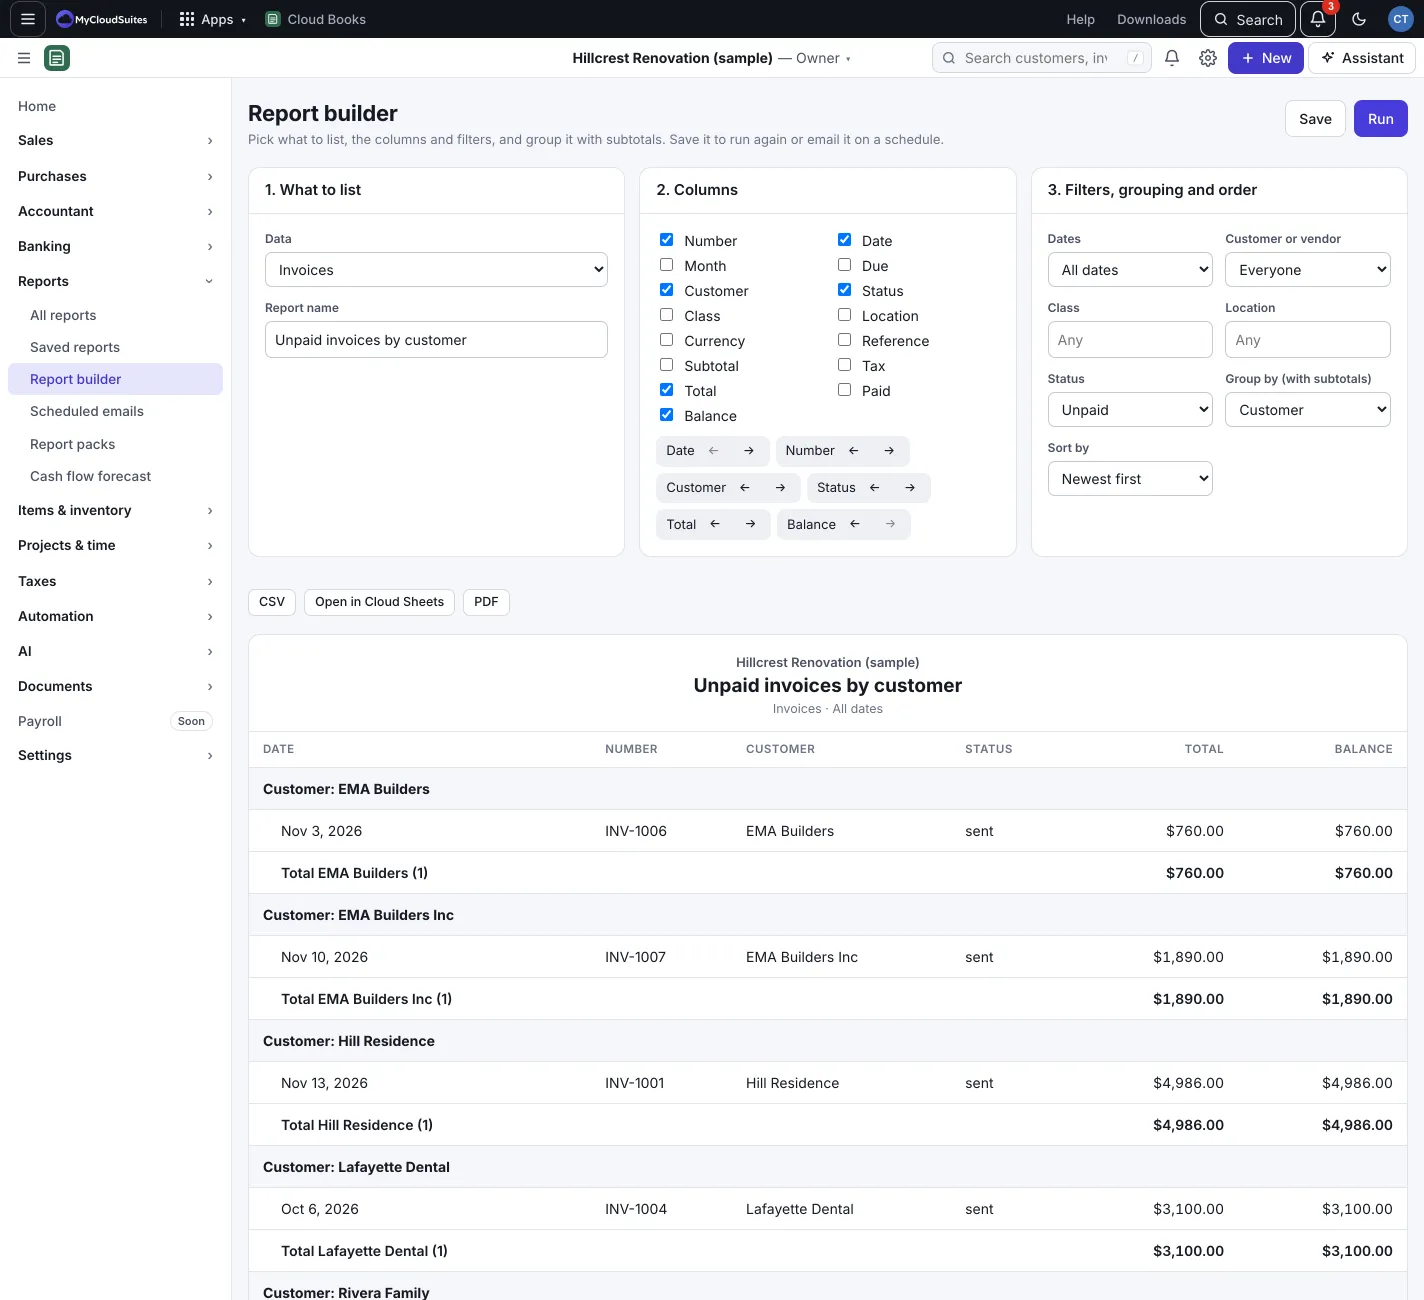
Build a report
- Go to Reports › Report builder. (Or New › Custom report.)
- 1. What to list: pick the Data: Invoices, Bills, Expenses, Payments, Journal lines, Customers, Vendors, Products and services or Time entries. Give it a Report name.
- 2. Columns: tick the columns to show. Use the arrows to move a column left or right.
- 3. Filters, grouping and order: narrow it by Dates, Customer or vendor, Account, Class, Location or Status (the choices depend on the data). Pick Group by (with subtotals), and set Sort by and Order.
- Press Run to see it. Download it with CSV, Open in Cloud Sheets or PDF.
- Press Save to keep it.
Save a built-in report
Open any report from Reports › All reports, set its dates and options, and press Save. Give it a Name and press Save. A named period like “Last month” always means the month before the day the report runs.
Saved reports
Reports › Saved reports lists reports saved with their dates and options, and custom reports from the builder. Everyone in the company sees the list.
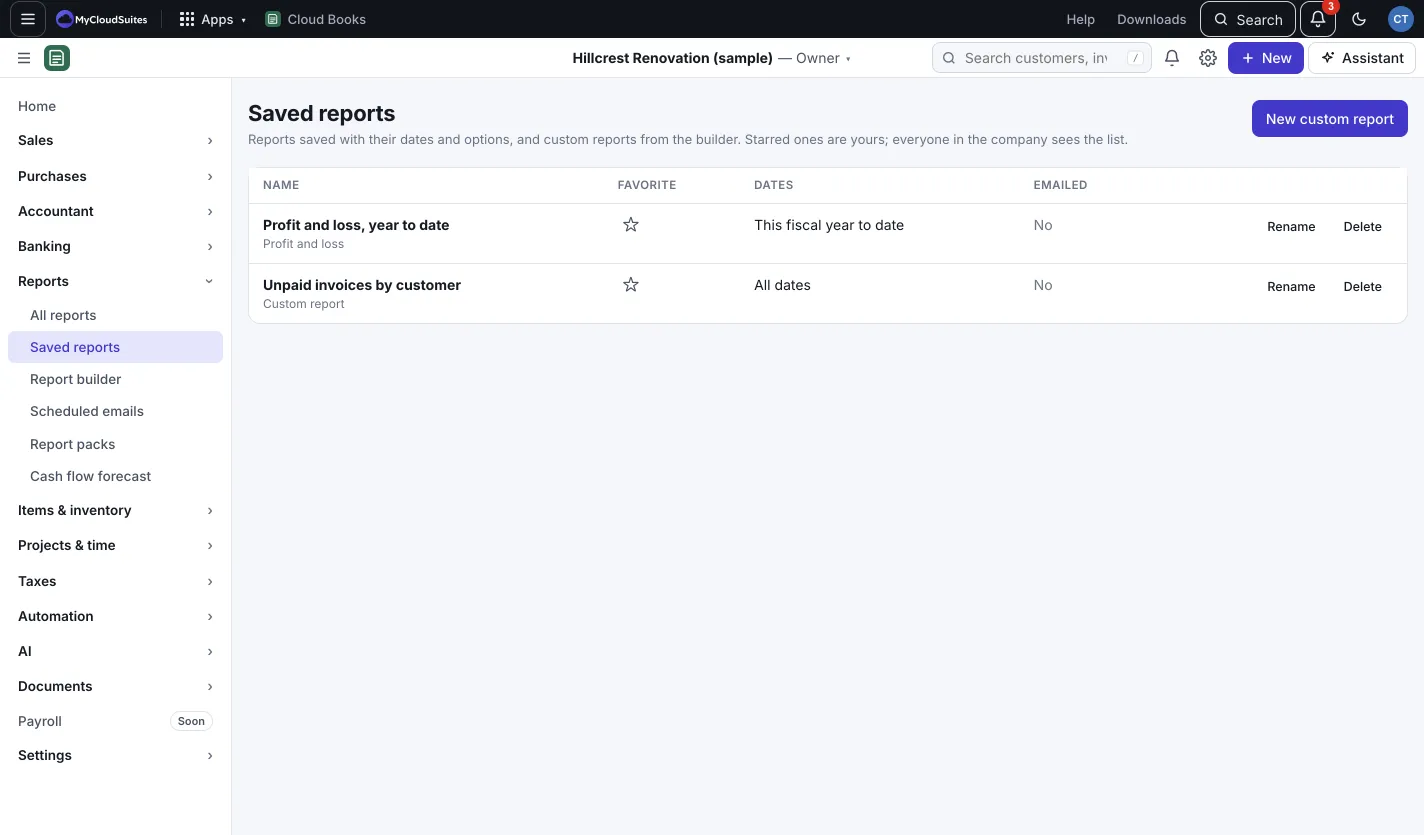
- Click one to run it with today’s numbers, then download it as CSV, Open in Cloud Sheets or PDF.
- Press the star to make it a favorite. Starred ones are yours and sit at the top.
- Press Rename or Delete. Deleting a saved report stops its scheduled emails too.
- Schedule email (owners and admins) sends it on a schedule. See Email reports on a schedule.