

Export a photo as JPG, PNG and more
Updated November 15, 2026
Export makes a file from your picture. Your layers stay in Cloud Photo; the export is what you send or post.
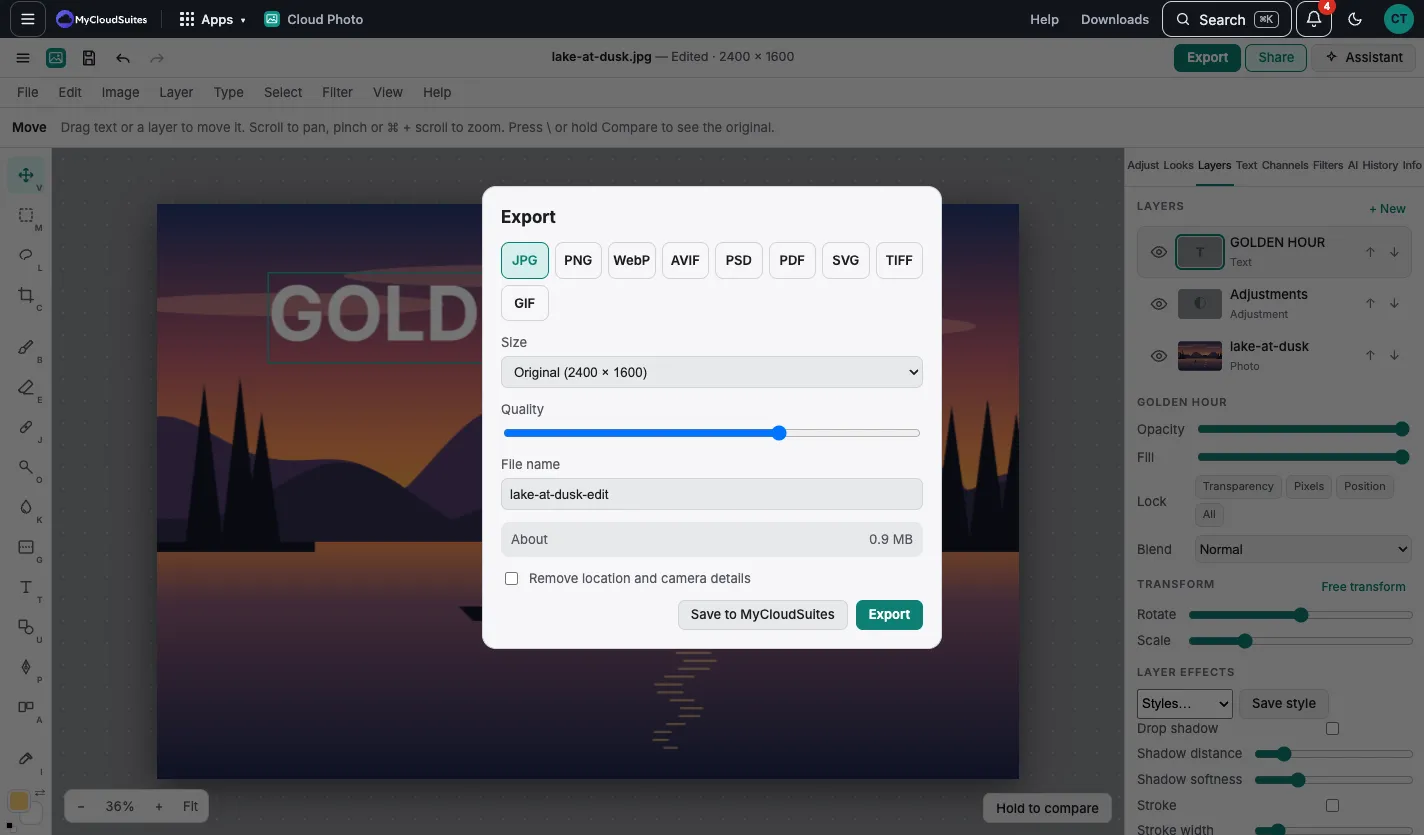
Export
- Choose Export at the top right, or File › Export… (⇧⌘E).
- Pick a format: JPG, PNG, WebP, AVIF, PSD, PDF, SVG, TIFF or GIF.
- Pick a Size: Original, a size for the web (2048 wide at most) or a Square post (1080 × 1080).
- Set the Quality for JPG, WebP and AVIF. About shows roughly how big the file will be.
- Type a File name and choose Export.
Options
- Remove location and camera details takes the GPS place and camera information out of a JPG.
- For PDF and TIFF you can set the print resolution and export in CMYK for a printer. See Printing and CMYK.
- Save to MyCloudSuites keeps the layered picture in your cloud files (Plus).
- For a website, pick JPG or WebP and the web size: a smaller file that still looks sharp.
Keep every layer
To keep working later, save a .psd: File › Save as .psd. It opens again here, or in other pro editors, with every layer. See .psd files.
If something goes wrong
- The file is bigger than you expected. Lower the Quality, or pick the web size.
- Colors look different elsewhere. Some programs ignore color profiles: choose Image › Color profile › Convert to sRGB before exporting.