

Get started with Cloud Photo
Updated November 13, 2026
Cloud Photo is a photo editor with layers. It runs in your browser at mycloudsuites.com/apps/photo, on your phone’s browser, and as a desktop app for Mac and Windows. Every tool is free except the AI tools, which use AI credits.
Your first edit
- Open Cloud Photo. Choose From this computer to open a photo, or The example photo to try things out.
- In the Adjust tab on the right, drag Exposure or Contrast. The change goes on an Adjustments layer, so the photo underneath is never touched.
- Try the Looks tab for a one-tap style, then set its Strength.
- Choose Export at the top right to save a JPG, PNG or another format.
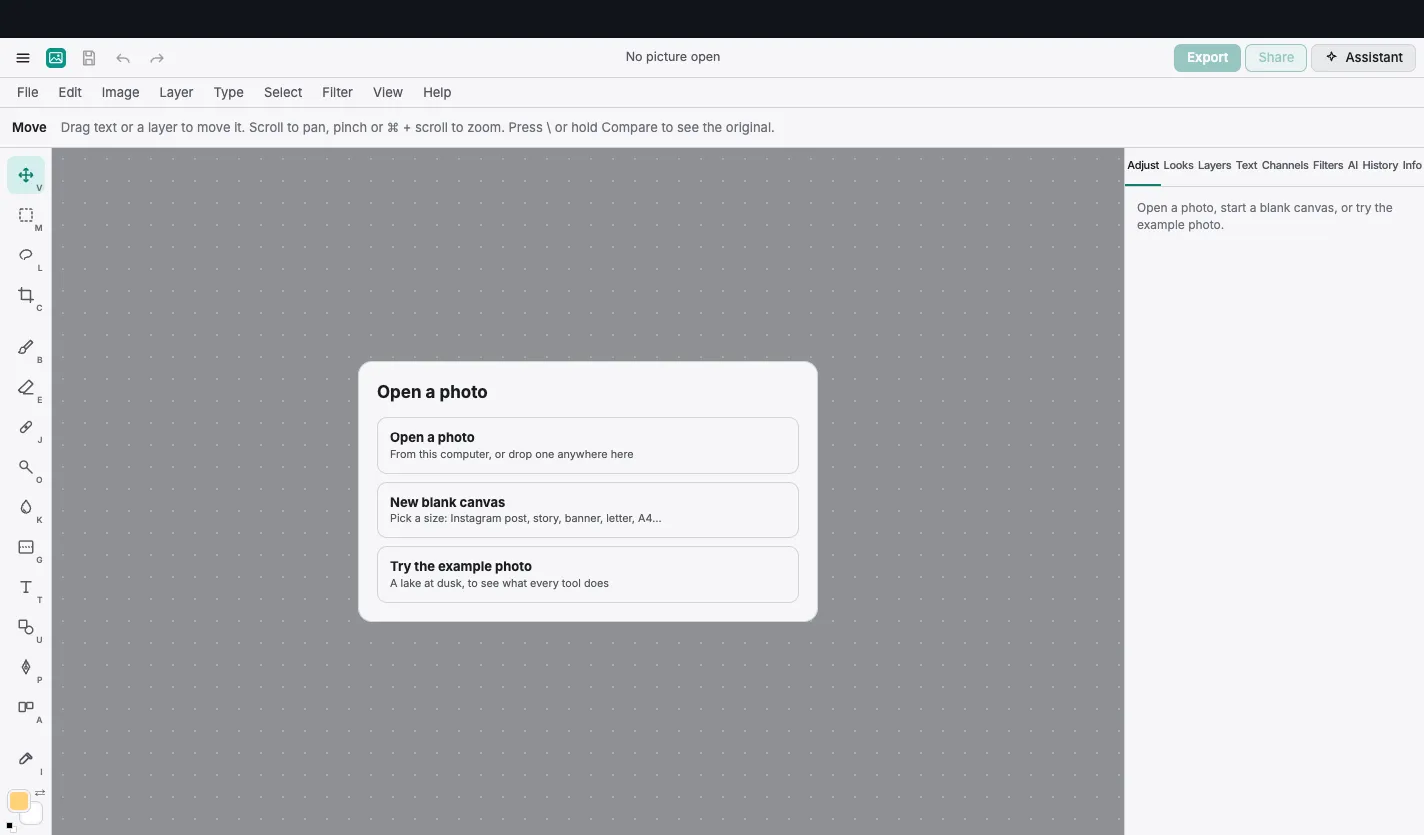
Where things are
- The bar at the top: the menus button, Save, Undo and Redo, the file’s name, Export, Share and Assistant (the AI tools).
- The menus: File, Edit, Image, Layer, Type, Select, Filter, View and Help.
- The tools on the left: Move, Select, Lasso, Crop, Brush, Eraser, Heal and clone, Dodge and burn, Sponge, blur and sharpen, Gradient, Text, Shape, Pen, Artboards and the color picker.
- The tool’s options in the bar above the photo.
- The panels on the right: Adjust, Looks, Layers, Text, Channels, Filters, AI, History and Info.
On a phone the tools are along the bottom instead: see Cloud Photo on your phone.
Tips
- Hold Hold to compare, or press \, to see the photo before your changes.
- Everything you do can be undone with ⌘Z (Ctrl+Z on Windows), and the History tab goes back to any step.