

Send a PDF for signature
Updated November 13, 2026
Send for signature emails a PDF to the people who need to sign it. They sign on any phone or computer, with no account and nothing to pay. When everyone has signed, each person gets a sealed copy with a certificate page that shows who signed and when.
Before you start
- Send for signature is part of MyCloudSuites Plus, from $5 a month ($50 a year). Plus includes 5 requests a month. After that, each request costs 25 AI credits.
- It works in Cloud PDF in your browser and in the desktop app 1.0.21. In the desktop app, sign in to MyCloudSuites first (Preferences › Account).
Choose who signs
- Open the PDF and choose Sign › Request signatures.
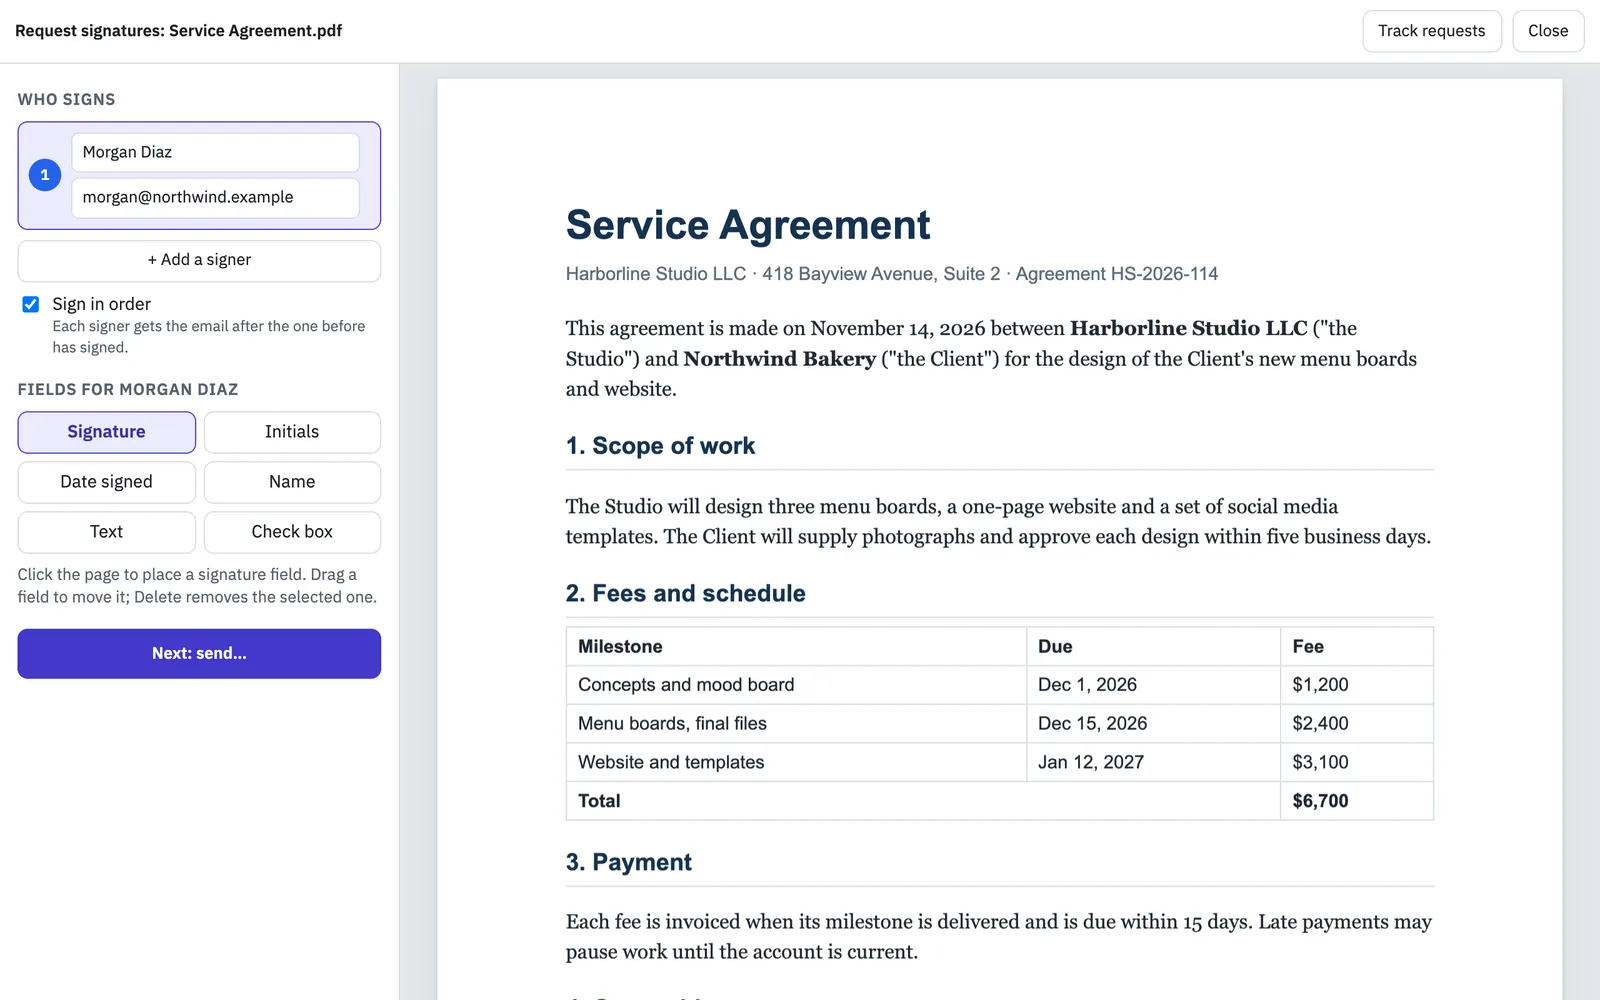
- Under Who signs, type the first signer’s full name and email.
- Choose + Add a signer for each other person, up to 10. Each signer needs their own email address.
- Leave Sign in order on if people should sign one after another. Each signer gets the email after the one before has signed. Use the ↑ and ↓ buttons to change the order. Turn it off to email everyone at once.
To remove a signer and their fields, choose × beside them.
Place each signer’s fields
- Click a signer in the list. The fields you place now are theirs, shown in their color.
- Pick a field: Signature, Initials, Date signed, Name, Text or Check box.
- Click the page where it goes. Drag a field to move it, or drag its corner to resize it. Select a field and press Delete to remove it.
- For a Text field you can type a Label, such as Phone. Text fields and check boxes can be marked Required.
Every signer needs at least one Signature or Initials field. Date signed and Name fill in by themselves.
Write the message and send
- Choose Next: send….
- Check the Document name and the Subject. The subject starts as “Please sign:” and the document’s name.
- Add a Message if you like. Signers see it in the email and on the signing page.
- Under Remind signers, choose how often people who haven’t signed get a reminder: Never, Every day, Every 2 days, Every 3 days or Every week.
- Under Link works for, choose how long signers have: 7, 14, 30, 60 or 90 days.
- Read the price line above the buttons. It tells you whether this request is included with Plus, and how many are left this month, or how many credits it costs and how many you have.
- Choose Send.
A request is charged once it’s sent, even if nobody signs, and cancelling it doesn’t give the charge back. A request that fails to send isn’t charged.
What signers see
Each signer gets an email with a Review and sign button. They can open it on a phone or a computer, with no account or app.
- The page shows the document with their fields highlighted. Next field takes them to each one.
- They adopt a signature by typing or drawing it, and choose Adopt and sign.
- They choose Finish.
A signer can also choose Decline and say why. Then the request ends and you get an email. Text-message codes aren’t available yet.
When everyone has signed
The PDF gets a certificate page with who signed, when, and from which IP address, and a MyCloudSuites seal that shows if anything changes later. Each signer gets an email with a link to download their copy for 30 days. You get an email too, and the signed copy is in Sign › Track. See Track your signature requests.
Coming soon
- Coming soon: signing templates you can reuse.
- Coming soon: a signing link anyone can open to sign.
To sign a PDF yourself, see Fill in a form and sign it.