

Protect a PDF with a password
Updated November 13, 2026
You can lock a PDF so it needs a password to open, or so people can read it but can’t print, change or copy it. Cloud PDF uses AES-256 encryption. Password protection works in the browser and in the desktop app.
Add a password
- Open the PDF.
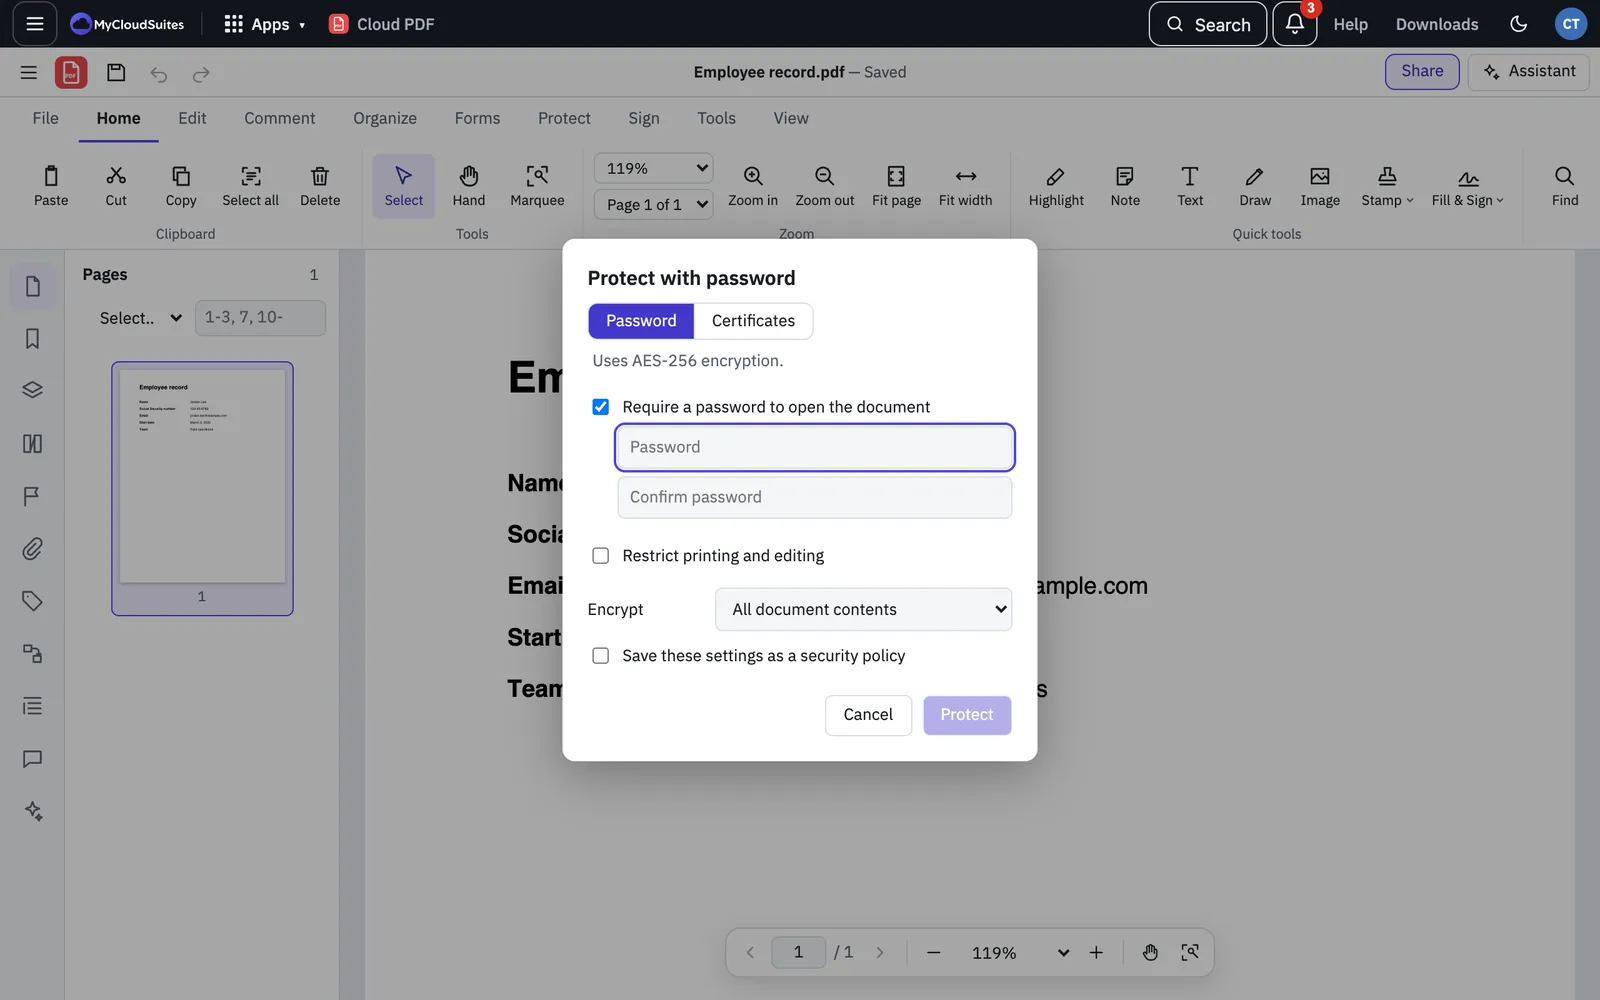
- Choose Tools › Protect & Redact › Protect with Password…. You can also choose Password on the Protect tab of the ribbon.
- To make people type a password to open the file, tick Require a password to open the document. Type the password, then type it again in Confirm password.
- To limit what people can do, tick Restrict printing and editing. Type a permissions password and confirm it. It must be different from the open password.
- Choose the permissions (see below).
- Under Encrypt, choose what to lock: All document contents, All contents except metadata (search engines can read it), or Only file attachments.
- Choose Protect.
- Save the file with File › Save (Ctrl+S, or ⌘+S on a Mac).
Keep your passwords somewhere safe. If you lose the open password, the file can’t be opened.
Permissions
These apply to anyone who opens the file without the permissions password.
- Printing allowed: None, Low resolution or High resolution.
- Changes allowed: None; Filling in forms and signing; Commenting, filling in forms and signing; or Any except extracting pages.
- Allow copying of text and images: untick it to stop people copying text and pictures. This also stops exporting to Word, Excel and other formats.
To reuse the same settings later, tick Save these settings as a security policy before you choose Protect. Your policies are under Tools › Protect & Redact › Security Policies….
Open a protected PDF
When you open a PDF with an open password, Cloud PDF asks for it. If the file has a permissions password too, type that one to get full access.
Change or remove the password
- Open the PDF with its password.
- Choose Protected on the Protect tab of the ribbon, or Tools › Protect & Redact › Protect with Password….
- Document security shows how the file is protected. Type the permissions password if it asks for it.
- Choose Remove security.
- Save the file. To protect it again with new passwords, choose Protect with Password… once more.
Certificate security (desktop app)
Tools › Protect & Redact › Protect with Certificates… encrypts a PDF for chosen people, each with their own digital ID and their own permissions. Only the people you add can open it. Add yourself too, or you won’t be able to open the file after you close it. Certificate security works in the desktop app only, and the desktop app can use digital IDs in the Windows certificate store or the macOS keychain.
Remove hidden information
Before you share a PDF, check it for things people can’t see on the page.
- Choose Tools › Protect & Redact › Remove Hidden Information…, or Remove hidden info on the Protect tab of the ribbon.
- Cloud PDF lists what it found, such as hidden text, hidden layers, content outside the page, document metadata, attached files, JavaScript, comments, form fields, bookmarks and private data saved by other apps.
- Untick anything you want to keep, then choose Remove.
- Save the file. You can undo until you save.
Older saved versions inside the file are always removed too.
To take out text and pictures that people can see, use Redact.